
April, 2023
I am, unashamedly, addicted to Govee lights. Ever since discovering them for a previous project, I’ve bought over a dozen of their various light fixtures and can now create tailored lighting designs throughout my house through their mobile app. I had the privilege of meeting the team live at CES 2023 this year (even met their North America President, super nice guy), and seeing some of their new, innovative designs, which only made me like them more.
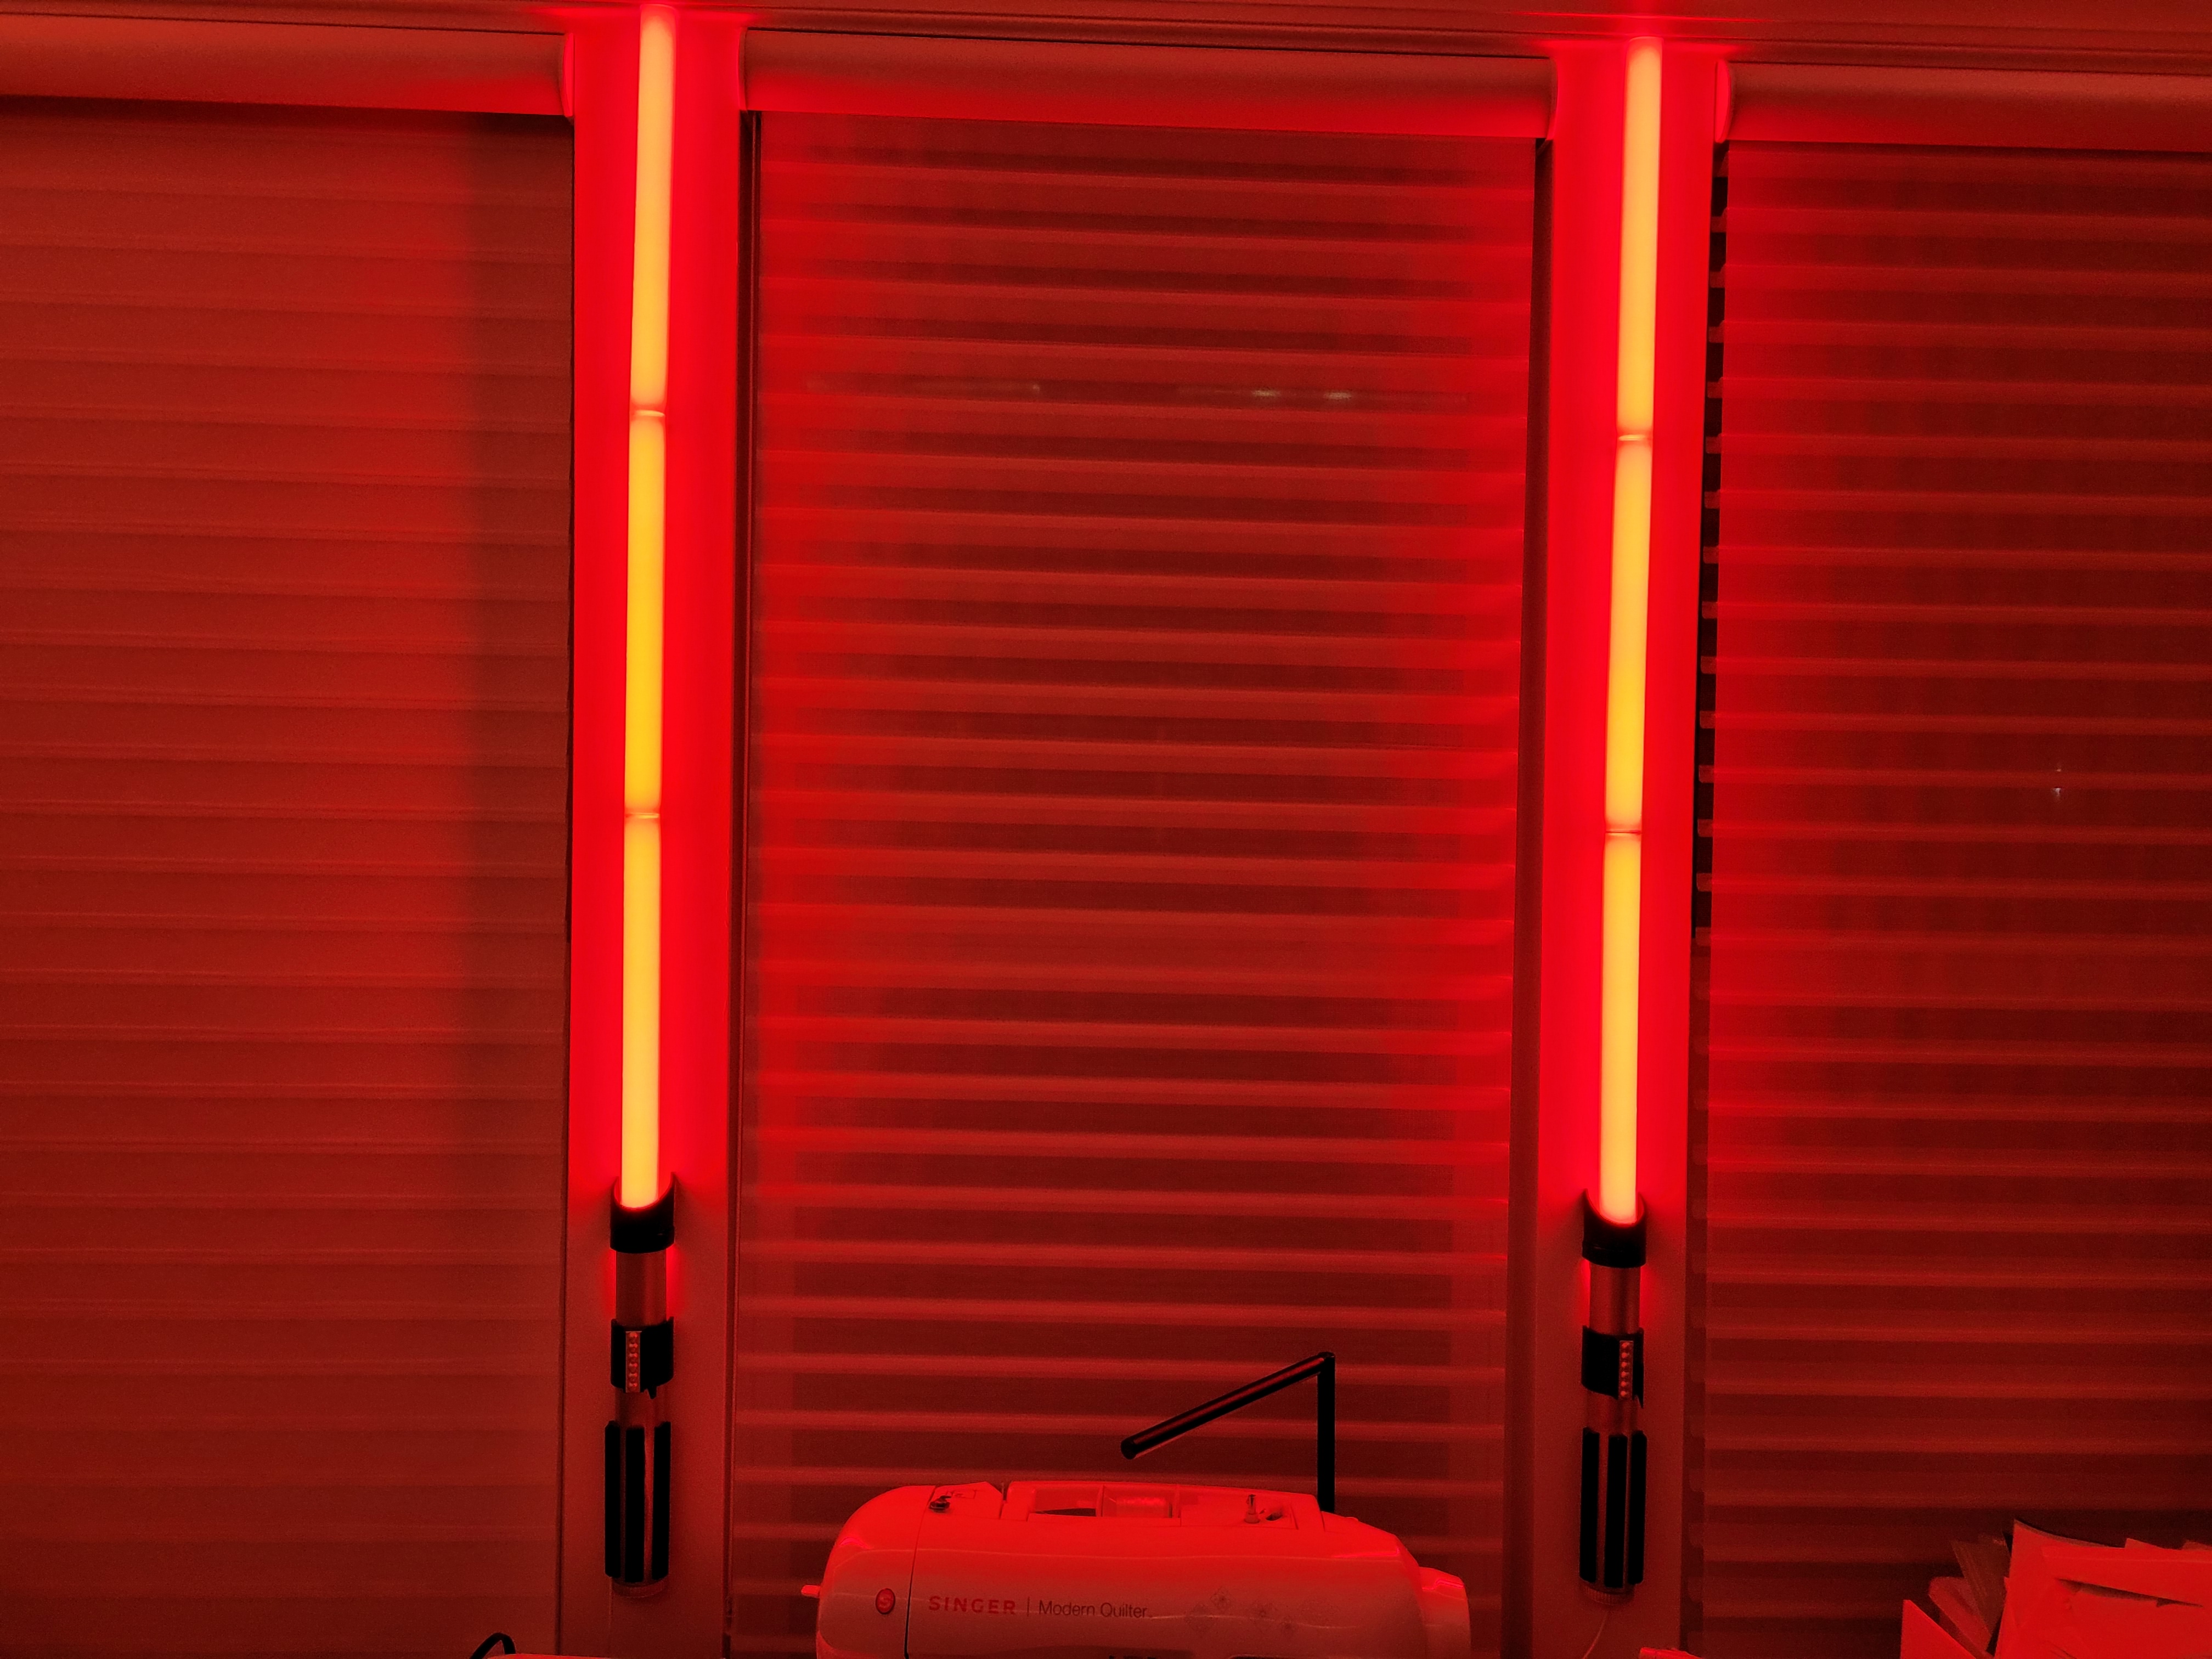
A few months ago, I bought some of their Glide Lively RGBIC Wall Lights and mounted them between the windows in my sun room. These come in 6 segments and connect to create 2 lights that are 1.25″ wide and 45″ long. I have them setup to run various light/colour patterns throughout the day, scheduled via the Govee app.

I thought it might be fun to create some Lightsaber hilts as wall sconces to mount underneath and make them look like lightsabers. This project took less than a week and I was able to use parts on-hand with no purchases necessary.
Design
I compared the dimensions of the Govee light with the blade of Darth Vader’s light saber, and did the math to determine how I would need to increase the scale to make it appear correctly. The hilt would need to be roughly 1.5x larger than the real thing – about 1.9″ OD, and 13 inches long. To my pleasant surprise, a 1.5″ ID PVC pipe was a nearly perfect fit for this project. Best of all, I had some scrap pieces on hand that were long enough.
After some research, I found an interesting Thingiverse project that gives the 3D print files for a Darth Vader Lightsaber to go on top of a PVC pipe (nice job, Timmy_d3 for this design). I thought this could be a good basis for my project since I needed the hilt to be hollow to run the light wires through. This design is for a 1″ ID PVC pipe, so I would have to scale it up to fit a 1.5″ ID PVC pipe. After several design iterations, I found that scaling the .STL files to 150% was a bit too big, so had to bring it back to be 147% to make them fit correctly. Knowing that I intended to cut off some of the back pieces, I modified some of the parts to exclude any extra detail work that would not be needed (like the Emitter). It helped reduce filament and complete the prints faster.
Mounting the sconce to the wall introduce a unique challenge. I decided to custom design a 2-piece, sliding design that allowed secure gravity fitting. I came up with a simple, but effective design that included a rounded top piece to fit on the inside of the PVC pipe, and a base piece that mounts to the wall. This will let me slide the sonce down on top of the mounted block and hold it securely.

Build
Printing the pieces was quick and easy – total print time was under 6 hours. I used some left-over Black, PLA filament, and created the pieces with 3 outer shell layers and 15% infill. Not looking for strength, just good looks.

Next, I cut the 1.5″ PVC pipe to length (13″) and used my angle grinder with a cutting wheel to cut it length-wise into two halves. The design calls for a hollow interior and doesn’t have room for a full cylinder. Also, I needed the ability to attach a mounting bracket inside, so using the PVC halves worked well.
Because I used supports for the rounded bottoms of the grip pieces, I did do some clean-up work. After peeling as much as I could. I then wrapped the PVC pipe in 150 grit sand paper and use it to sand to match the curve of the pipe.
Unfortunately, no mounting holes were included in the design for the activation levers, so I had to carefully drill holes into the side of the Mid-section sleeves and press them in. I re-enforced with some glue, and they seem to be holding well. Looking back, I should have added these into the 3D print.
Next, I took them into my shop and gave them a coat of Rust-Oleum “2 in 1 Filler and Sander” primer coat. This stuff is fantastic for finishing 3D prints and avoiding lots of sanding. In this case, I was lazy and didn’t do ANY sanding – just sprayed this stuff and called it ‘good enough’. After that, I sprayed most of the parts Satin Black, and a few accent pieces and the PVC halves were painted Metallic Silver.

I briefly considered adding a clear coat to help with colour fading, but then decided not to proceed. In my experience, the clear coats always seem to dull the luster of metallic paint. Also, these are just wall ornaments, and will not be handled, so I didn’t feel the need to protect them. While they are in the sun room, they won’t get directly sunlight, as the windows shades are usually partially obstructing the sunlight.
I used my Dremel with a cutting wheel to carefully cut away the unneeded parts of each of the 3D prints. I intentionally did this waited until after painting to do this to keep the pieces as stable as possible during the painting processes, but now regrets that as it would have resulted in a better finish.
I used some Gorilla Glue Super Glue Gel to bond the 3D-printed pieces to the painted PVC. It worked well and cured quickly, but was a bit messy to work with. In the process, I created some blemishes in the metallic silver paint – frustrating. Next time, I’ll use less glue. The .STL file bundle included a special, disposable piece for spacing the grips evenly – this was really valuable and helped make the glue-up fast.
During the build, I evolved the mounting bracket a bit, to be a bit taller and include some flanges for better mounting surface area. I also included a slot in the middle to allow the nuts/bolts from the PVC-side to slide.


Conclusions
I feel the addition of these sconces turns these accent lights into “wall art”. It really enhances the appearance and fits well with our other Star Wars-themed decor. I’m especially pleased with how quickly and easily this project came together. “Quick wins” like these are fun to make without prolonged, agonizing over minor details or large expenses, like some of my other projects.
Of course, now that I’ve selected Darth Vader’s lightsaber hilt, it’s going to look strange if I have them displaying anything but red light. I’m going to have to play around with the Govee app to see if I can create some fun, red light patterns.


